

Fall nail designs bring warmth and elegance that perfectly match the changing season.
With autumn-inspired colors and themes, your nails can reflect the cozy, crisp feeling that defines fall. Many people love refreshing their manicure to align with the season’s inviting mood.
This article presents 20 stunning fall nail designs that offer fresh inspiration for anyone eager to try new looks. These designs cater to various styles and skill levels, making it easy for readers to find options that complement their personal taste without being overly complicated.
1) Rich Jewel Tone Ombre
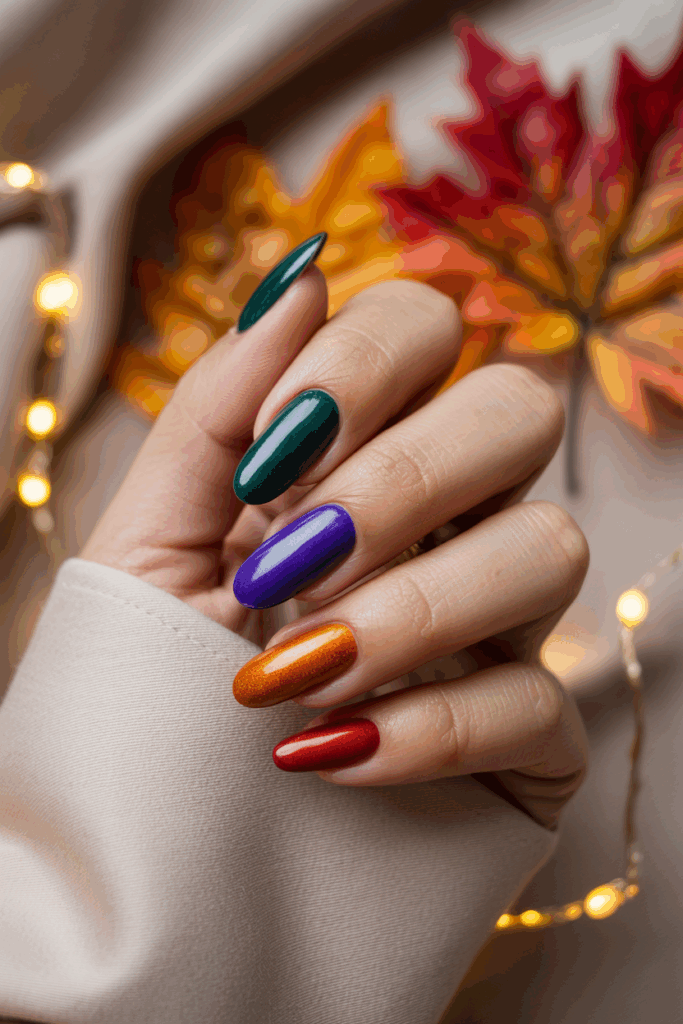
This design uses deep colors like emerald green, sapphire blue, and ruby red. The shades blend smoothly, creating a rich and elegant look. It suits the fall season by offering a bold yet refined style.
Jewel tones work beautifully in autumn because they mimic the richness of cozy scarves, gemstone jewelry, and seasonal decorations. The ombre technique lets you combine more than one shade without it looking busy, giving a sophisticated transition of color across each nail.
To style this manicure, pair it with metallic jewelry or neutral fashion pieces so the nails stand out as the focal point. Whether you choose glossy shine or matte velvet, the jewel tone ombre elevates any look for a polished, luxurious effect.
2) Chrome Swirl Accents
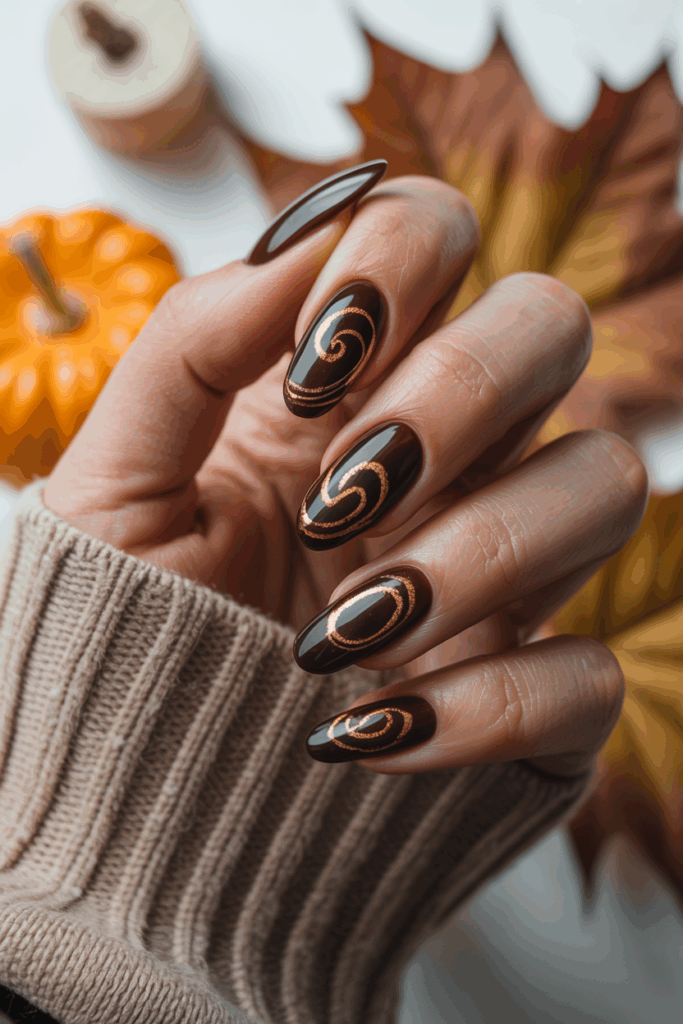
This design adds a modern twist to classic fall nails. Chrome swirls create a shiny, eye-catching effect on a neutral or dark base. It works well on any nail shape and adds a subtle touch of elegance without being too bold.
Chrome swirls are versatile because they can be kept soft and delicate or exaggerated for a more dramatic statement. On short nails, thin swirls offer just enough detail, while longer nails can handle bolder, more artistic patterns.
This manicure is also ideal for seasonal transitions, bridging the playful vibes of summer with the cozy depth of fall. It pairs beautifully with metallic accessories, making it a perfect choice for parties, dinners, or holiday gatherings.
3) Matte Pumpkin Orange
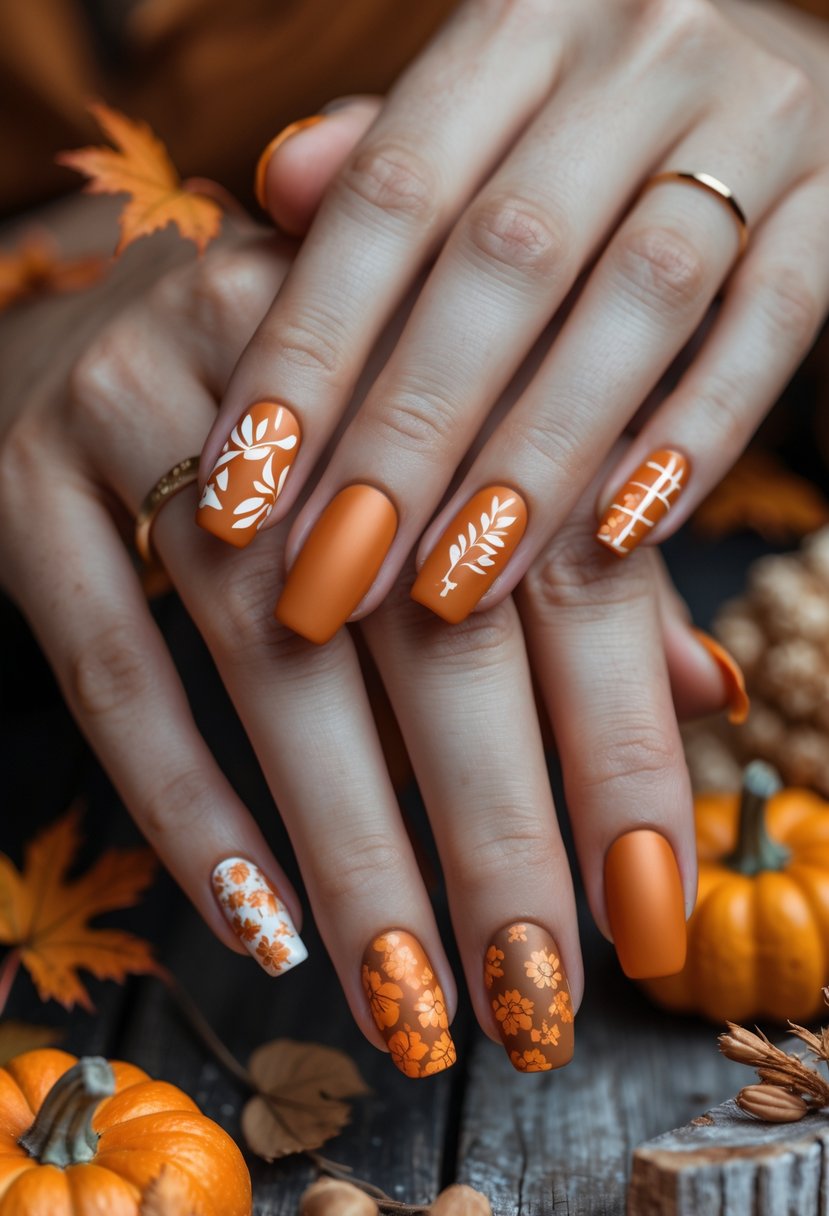
Matte pumpkin orange nails offer a warm, muted look perfect for fall. The flat finish reduces shine, giving nails a modern and sophisticated feel. This style pairs well with simple designs or can stand alone for a clean, seasonal statement.
Pumpkin orange is instantly recognizable as a fall color, making it a fun way to show seasonal spirit without being overly flashy. The matte finish gives it depth, making the shade look rich and velvety instead of bright and loud.
Add simple accents like thin black lines, gold foil, or even small pumpkin decals for variety. Whether you keep it minimal or accessorize, this shade is a perfect nod to autumn activities like pumpkin patches, bonfires, and cozy evenings.
4) Glittery Gold Tips
Glittery gold tips add a subtle shine to fall nails. They pair well with warm autumn colors like brown, orange, and deep red. This design balances sparkle and simplicity for a polished seasonal look.
Gold is timeless, and using it as a tip detail makes your nails look elegant without overwhelming the design. It catches the light beautifully, adding just enough shimmer for daytime or nighttime wear.
You can make this look versatile by switching up the base—nude for something classic, burgundy for a bold touch, or black for dramatic flair. This design is a chic way to add sparkle without committing to full glitter nails.
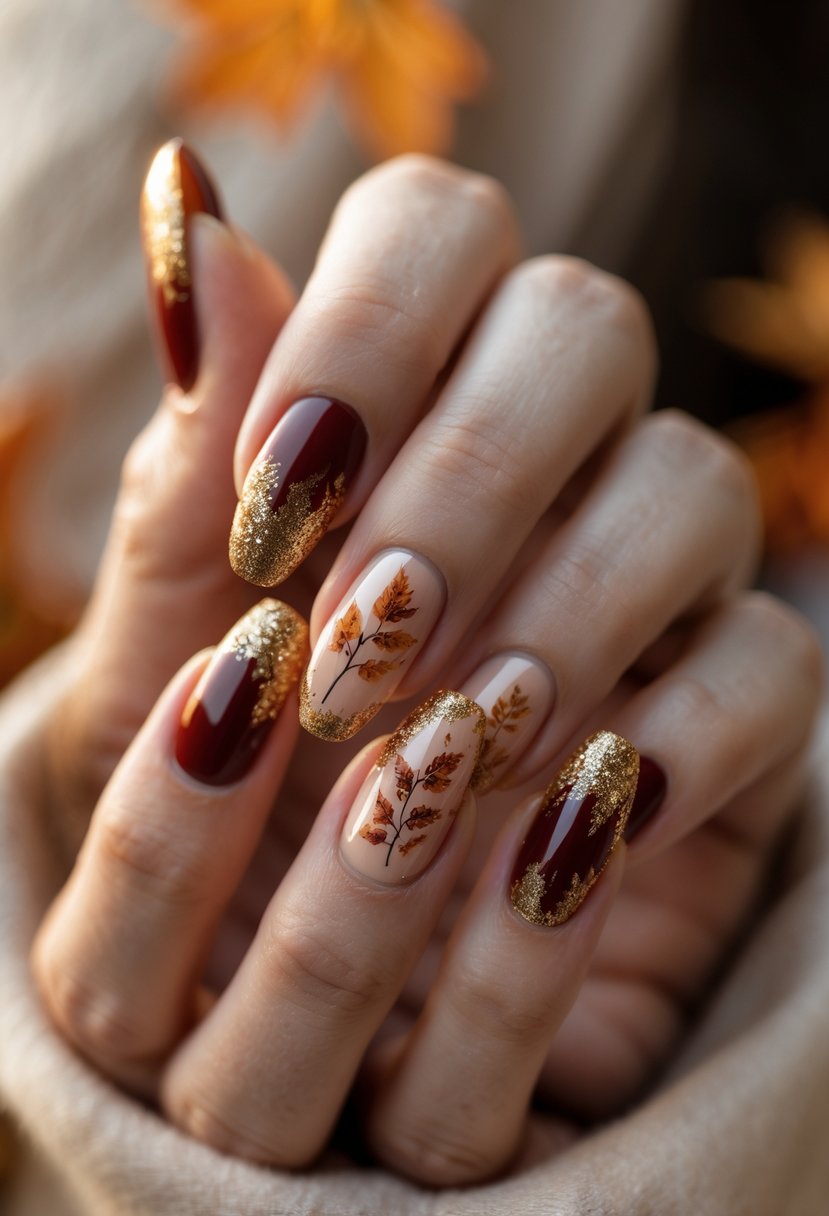
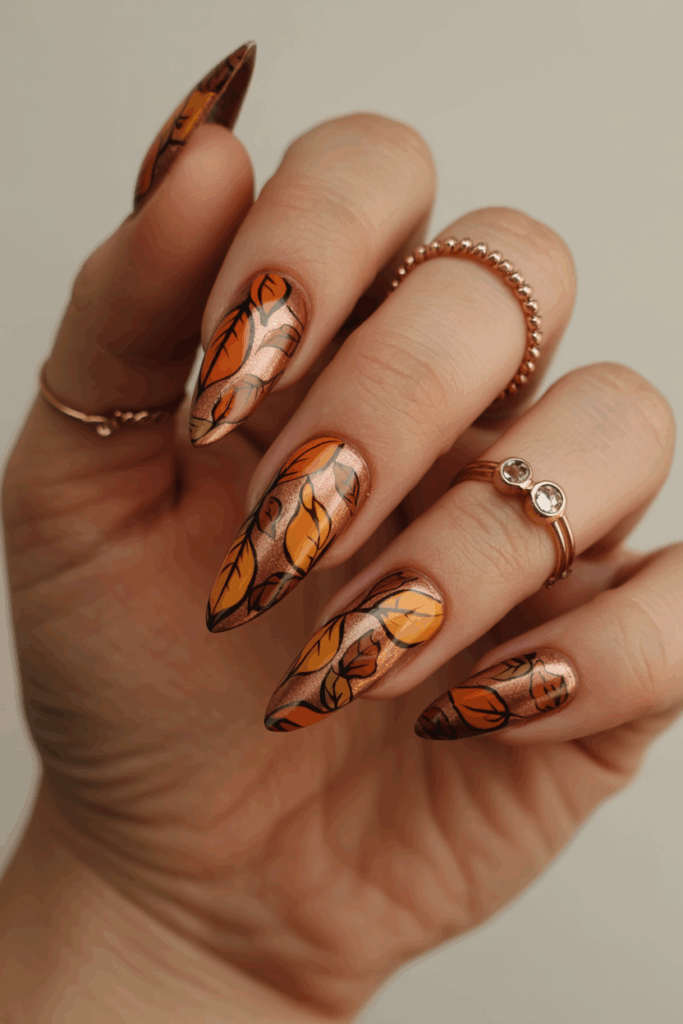
5) Deep Burgundy with Leaf Stamps
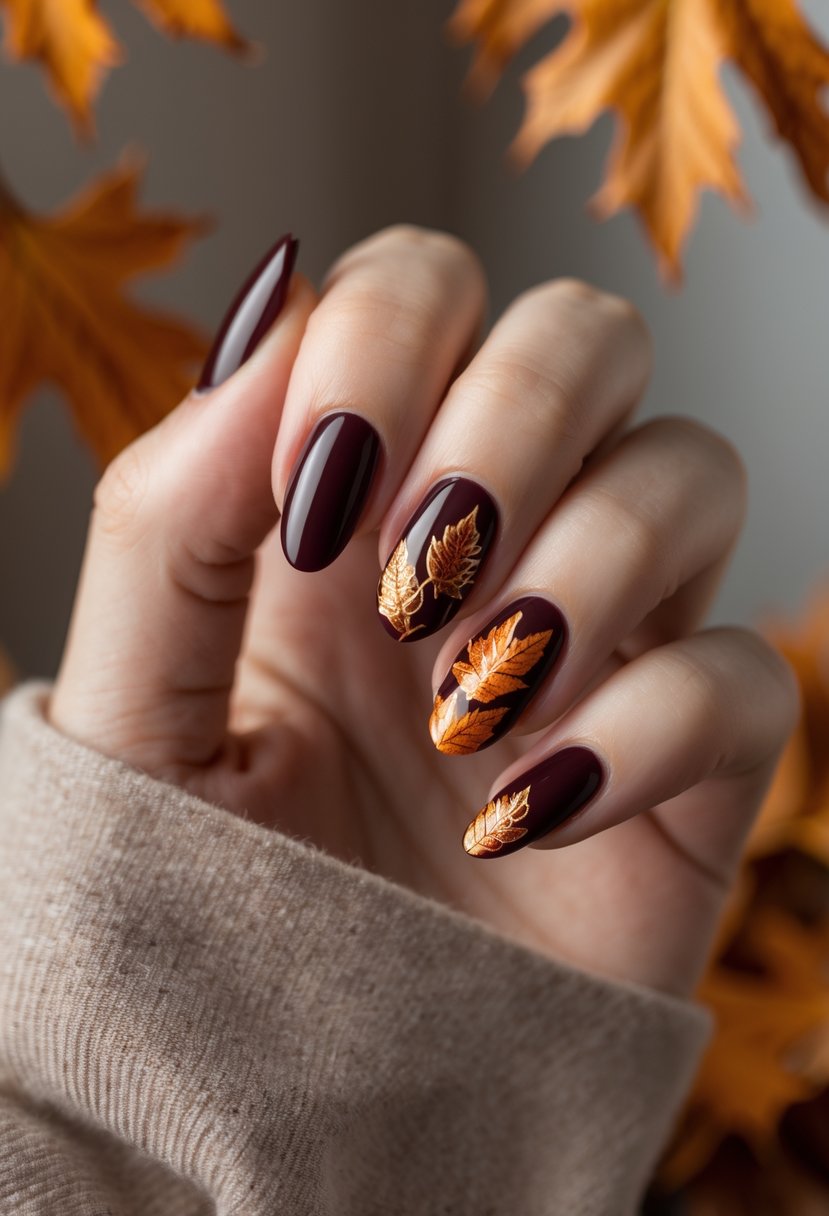
This design features a rich burgundy base that gives nails a deep, warm look. Leaf stamps in gold or green are added for a simple, elegant touch. The contrast highlights the beauty of autumn without being too bold. It suits both short and long nails well.
Leaf stamps are a simple way to add nail art that doesn’t require freehand painting. They make a manicure feel seasonal and decorative while still staying neat and minimal.
Burgundy is one of the most versatile fall shades—it works for casual wear, formal events, and everything in between. Adding leaf stamps turns it into a festive design that fits right in with the autumn mood.
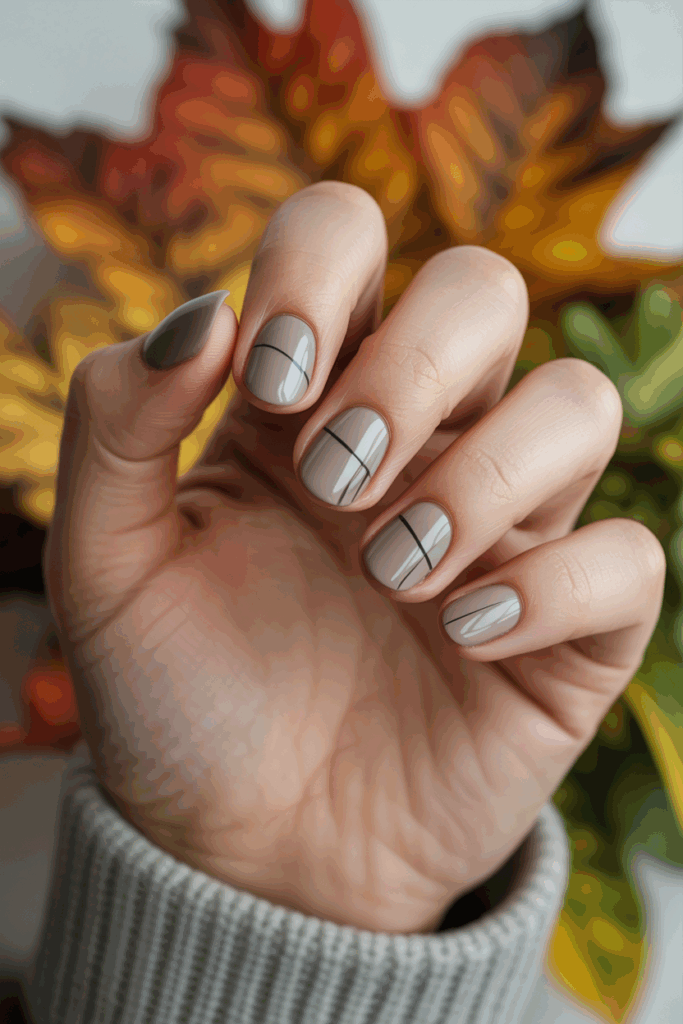
6) Muted Taupe with Minimalist Lines
This design pairs deep forest green with subtle metallic accents. The metallic highlights add a refined, elegant touch without overpowering the dark base. It suits both casual and formal looks. The contrast creates a balanced, polished effect that fits well with fall styles.
Forest green is grounding and rich, evoking the feeling of fall forests and evergreen trees. Adding metallic accents like gold or copper creates a luxe touch while keeping it seasonal.
This look can be as simple or as elaborate as you like—tiny flecks of foil for understated shine, or full metallic lines for a bolder finish. Either way, it’s a manicure that feels festive and stylish.
7) Dark Forest Green with Metallic Highlights
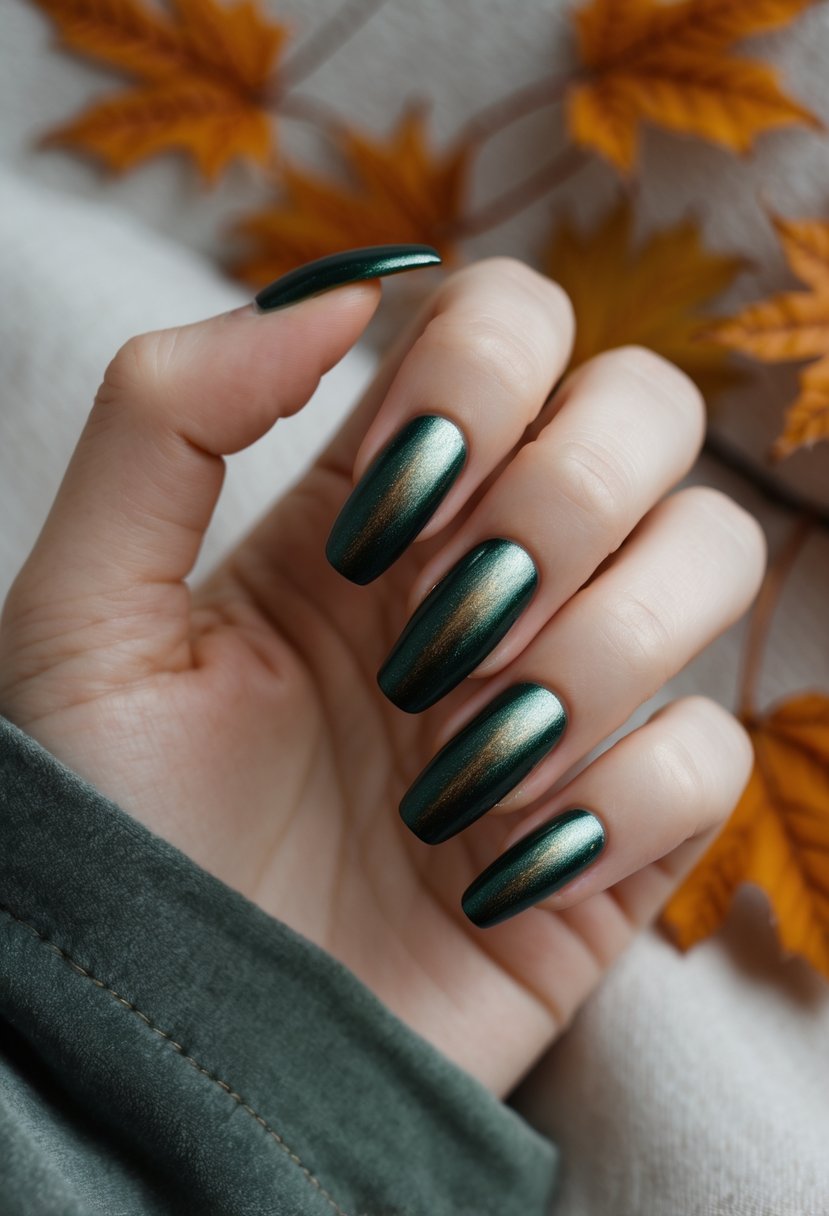
This design pairs deep forest green with subtle metallic accents. The metallic highlights add a refined, elegant touch without overpowering the dark base. It suits both casual and formal looks. The contrast creates a balanced, polished effect that fits well with fall styles.
Forest green is grounding and rich, evoking the feeling of fall forests and evergreen trees. Adding metallic accents like gold or copper creates a luxe touch while keeping it seasonal.
This look can be as simple or as elaborate as you like—tiny flecks of foil for understated shine, or full metallic lines for a bolder finish. Either way, it’s a manicure that feels festive and stylish.
8) Duochrome Purple Fade
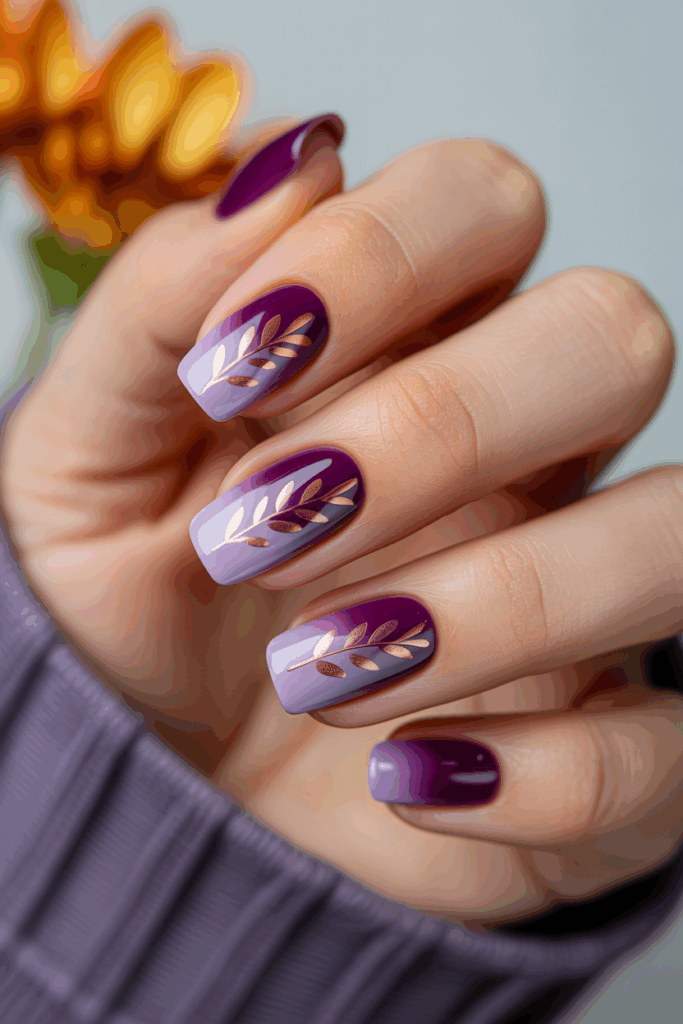
This design blends two shades of purple with a smooth fade effect. The colors shift depending on the light, giving the nails a subtle glow. It suits both deep plum and soft lilac tones. The duochrome fade adds depth without being too bold.
The play of light on duochrome polish makes it one of the most dynamic options for fall. It feels moody, mysterious, and glamorous all at once, making it perfect for seasonal transitions.
This design also pairs well with metallic rings or cozy sweaters, making the nails stand out. It’s subtle enough for daily wear but unique enough to feel like a special seasonal treat.
9) Classic Rust Red French Tips
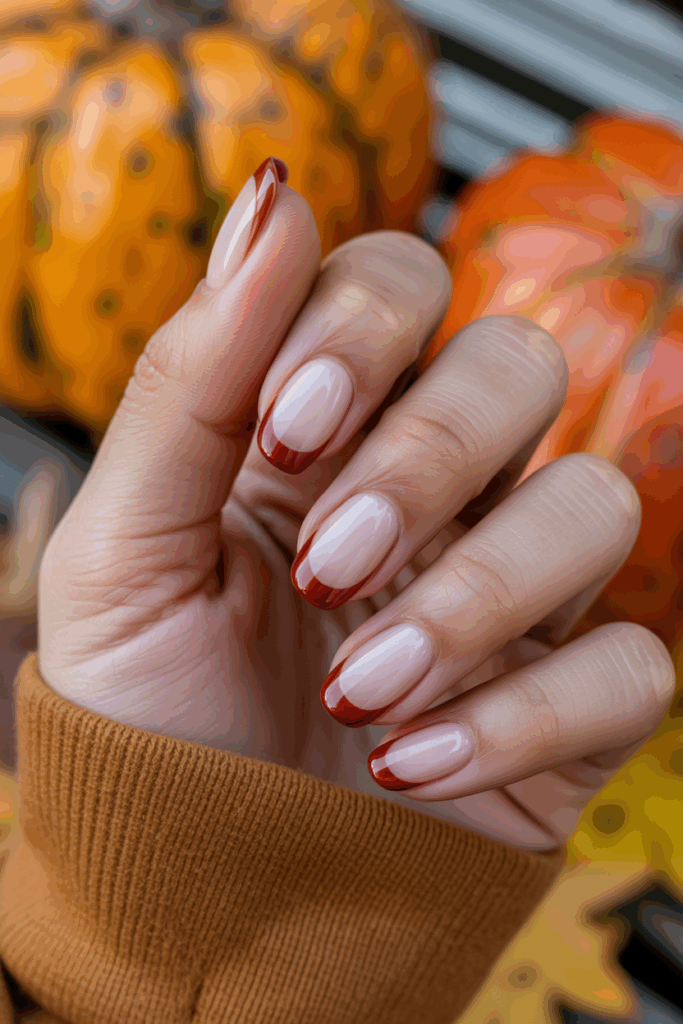
This design updates the traditional French tip with a rich rust red color. It brings warmth that matches the fall season. The look is simple yet elegant, suitable for short or long nails. It pairs well with both matte and glossy finishes.
Rust red is a fresh take on classic red, making it less formal and more seasonal. It’s a color that complements fall wardrobes filled with denim, knits, and earthy tones.
The French tip style also allows for customization—you can keep it thin and delicate or go bold with wide tips. This makes it a versatile manicure that can be tailored to any personal preference.
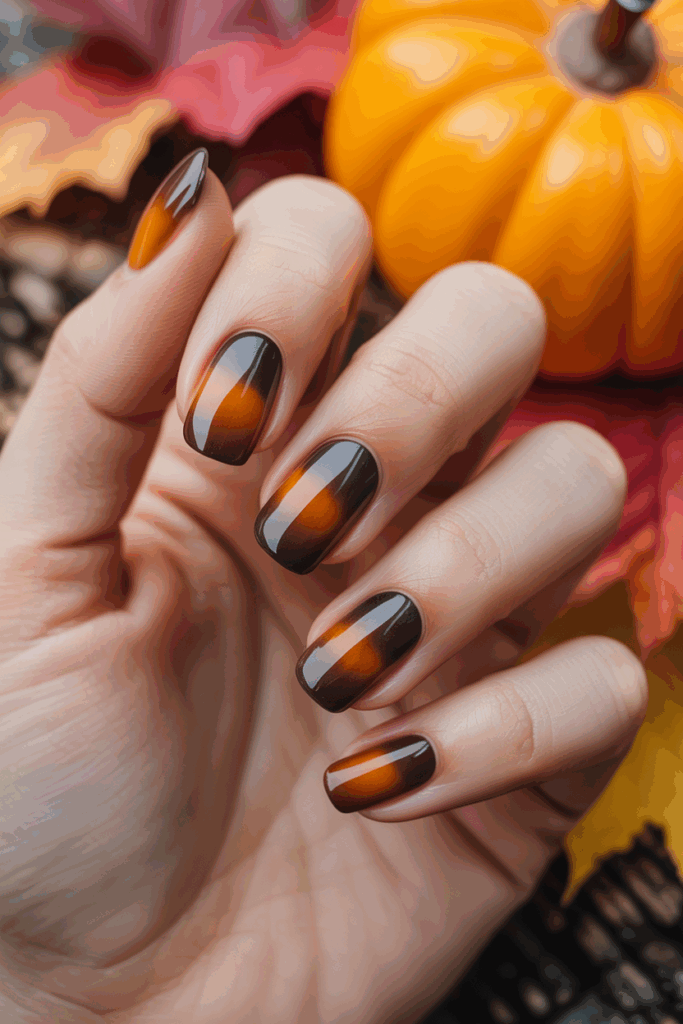
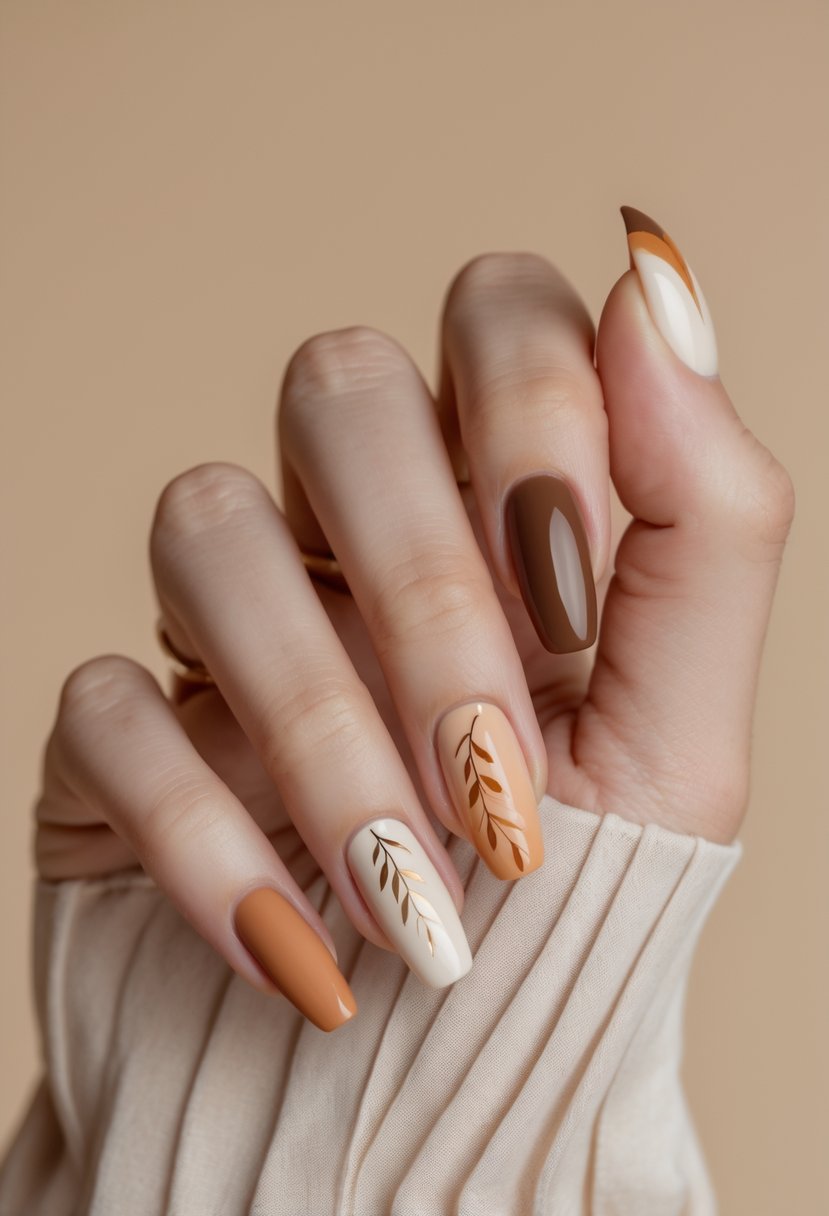
10) Tortoiseshell Pattern Accent Nails
Tortoiseshell accent nails use warm browns and amber tones to add a natural, elegant touch. They pair well with solid colors for a balanced, stylish look. This design fits well in fall, offering a trendy yet classic vibe.
The tortoiseshell pattern is timeless and sophisticated, giving nails a polished appearance that works with almost any outfit. It’s perfect for someone who wants design without being too flashy.
Adding it to just one or two nails keeps the look balanced. Combine with matte beige or glossy black on the other nails for a chic, fashion-forward manicure.
11) Copper Foil Detailing
Copper foil adds a shiny, metallic touch to fall nails. It works well with warm tones like brown and gold. The foil is applied on top of a dry base coat for a smooth finish. This design is simple but stylish for autumn.
Foil designs give nails a luxe, textured look while still being easy to wear. Copper in particular fits fall perfectly, as it mirrors seasonal leaves and glowing sunsets.
Whether you scatter it delicately or cover an entire nail, foil detailing makes a bold impression. It’s an effortless way to add elegance to your manicure.
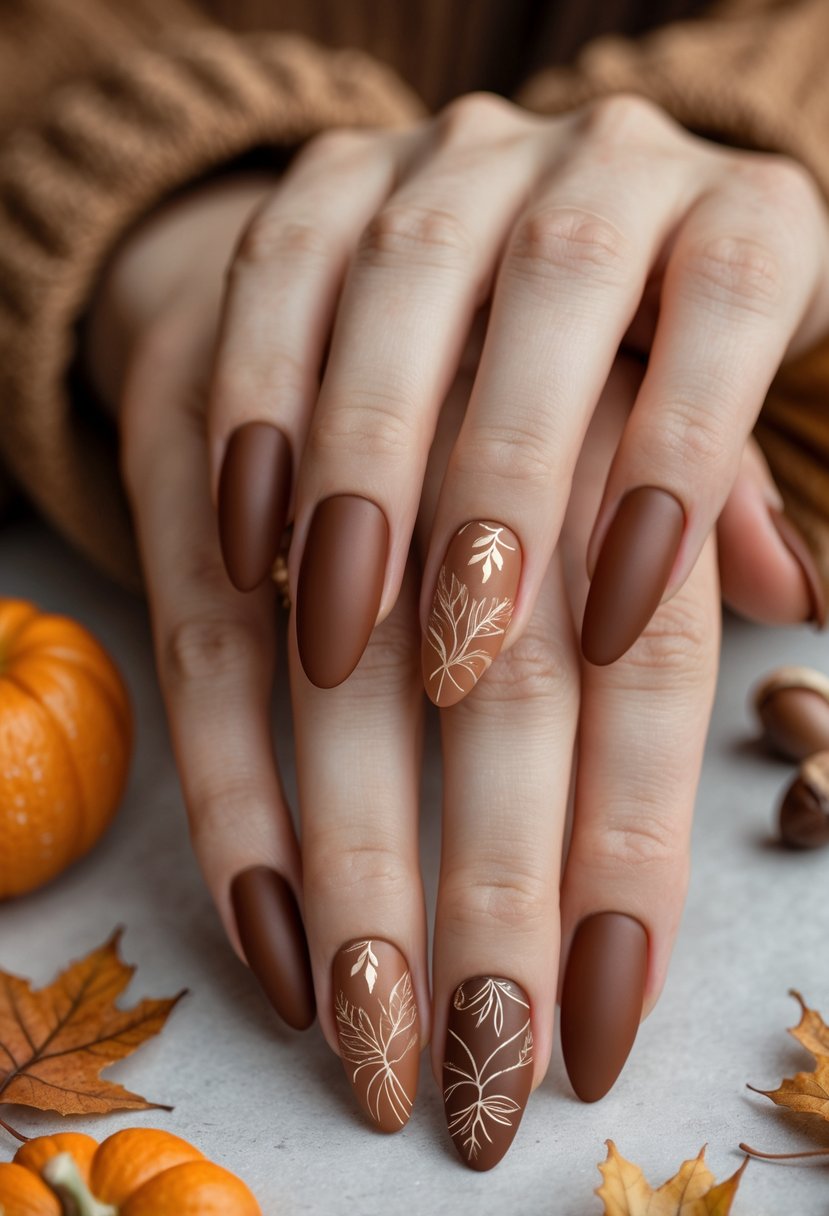
12) Warm Brown Gradient
The warm brown gradient blends shades like caramel, mocha, and chocolate. It creates a smooth transition that feels cozy and natural. This design suits fall well because it mirrors the season’s changing leaves and earthy tones.
Gradient nails are a stylish way to incorporate multiple shades without overwhelming the eye. The blending creates a soft, seamless look that feels elevated.
Pair this manicure with cozy fall outfits like chunky sweaters or plaid scarves for a perfectly seasonal vibe. It’s a versatile choice for anyone who loves neutrals but wants something dynamic.
13) Glossy Cranberry with Rhinestones

This design features a deep, glossy cranberry base that suits the fall season well. Rhinestones add a subtle sparkle without overwhelming the look. It works for both casual and dressy occasions, offering a simple yet elegant nail style.
Cranberry is bold but not too bright, making it a flattering shade for cooler months. The glossy finish makes it appear rich and festive.
Adding rhinestones keeps the design versatile—you can go minimal with one stone per nail or glamorous with full accent nails. Either way, it brings a touch of sparkle to your autumn style.
14) Soft Beige with Negative Space
This design uses soft beige as the main color with carefully placed negative space for a modern look. It often features simple shapes like stripes or half-moons. The style is subtle yet creative, fitting well with fall’s calm and muted tones.
Negative space keeps the design light and airy, while beige grounds it in neutrality. The balance makes it wearable for almost any setting.
If you want to dress it up, pair it with metallic accents or matte finishes. This manicure is minimal but artistic, making it ideal for fall.
15) Burnt Sienna Matte Finish
The burnt sienna matte finish is a simple and elegant choice for fall. It offers a warm, earthy tone without shine. This look works well on almond or oval-shaped nails for a subtle seasonal style.
Burnt sienna has a rustic quality that feels comforting in cooler months. The matte effect makes the color even richer and more stylish.
You can enhance the look by pairing it with gold jewelry or layering in small foil accents. Even on its own, this shade feels timeless and perfectly seasonal.
16) Translucent Amber with Gold Flakes
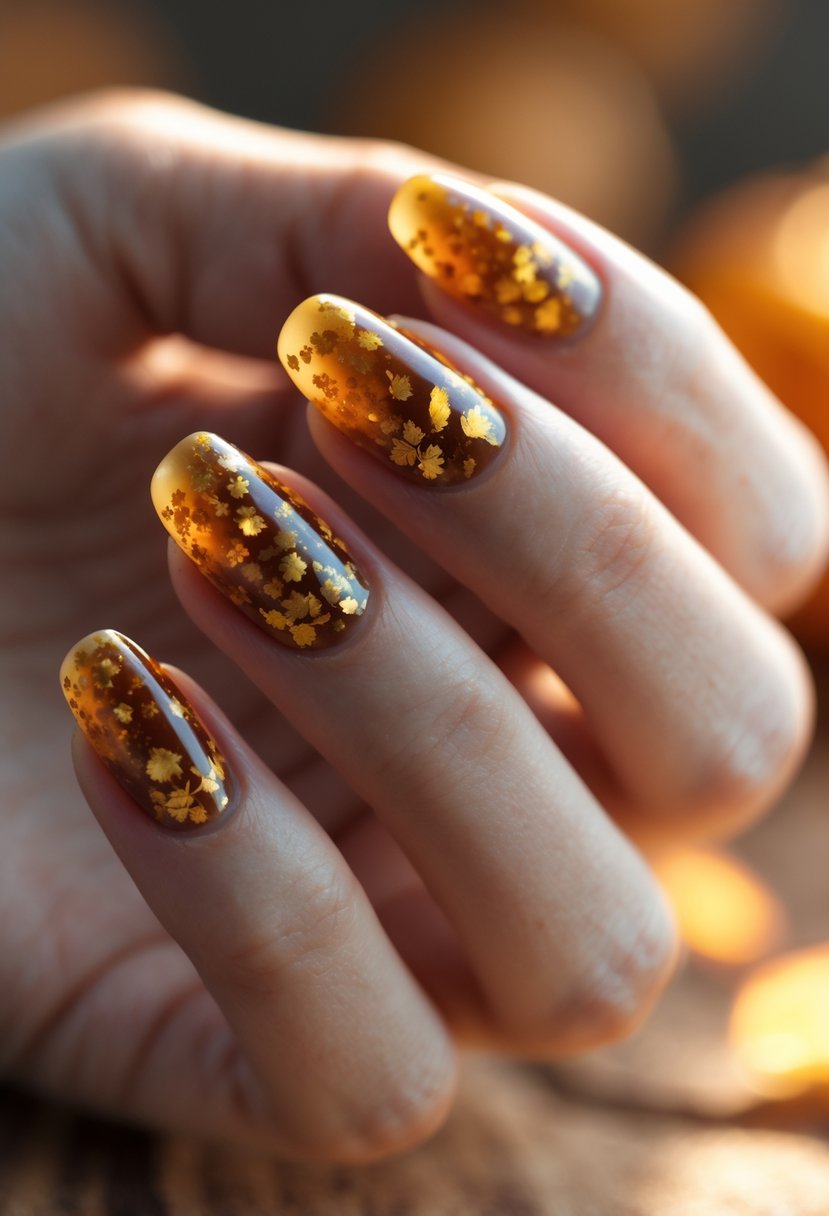
This design uses a soft amber color that looks clear and warm. Gold flakes add a light shimmer that catches the eye without being too bright. The nails feel cozy and perfect for fall. It works well with simple or detailed manicures.
Amber has a glowing, glass-like quality that feels unique compared to solid shades. The addition of gold flakes creates movement and dimension.
This look works beautifully for both everyday wear and special events. It’s understated, but the shimmer adds a touch of seasonal magic.
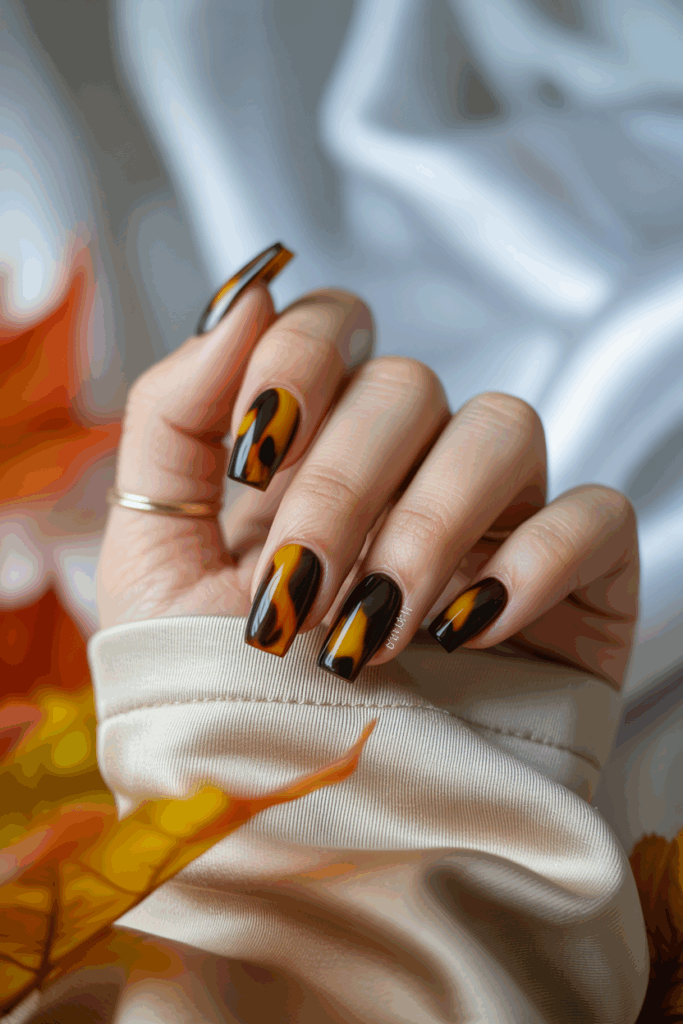
17) Graphical Black and Orange Contrast
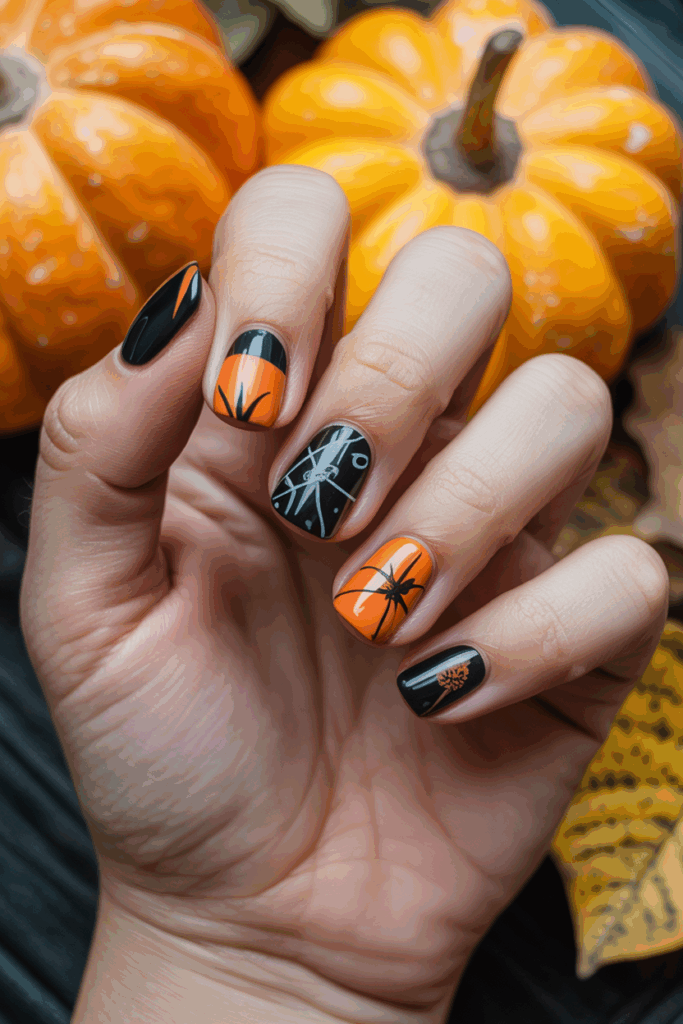
This design pairs bold black and bright orange for a sharp look. It uses clear lines and shapes to create a strong contrast. The style fits both casual and dressy fall occasions. It offers a modern take on classic autumn colors.
18) Midnight Navy with Silver Stars
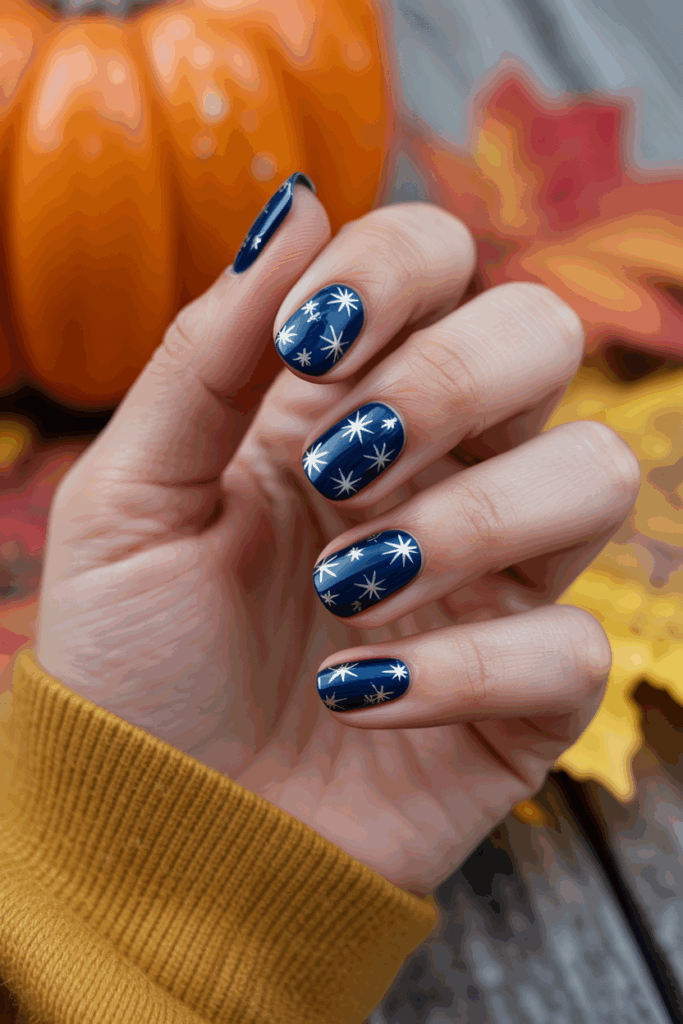
Navy blue is always a sophisticated shade, but in fall it feels especially striking against neutral, cozy outfits. When paired with tiny silver star accents, the nails instantly take on a celestial vibe that echoes crisp autumn nights. A glossy topcoat helps the design shine, while the stars bring playful sparkle.
This manicure is great for someone who wants a bold color but still leans elegant. You can make it simple with scattered stars on one or two accent nails or go full galaxy with stars across the entire set. Either way, the look feels magical and seasonal.
Pair midnight navy nails with silver rings or cool-toned sweaters to enhance the effect. It’s the kind of manicure that transitions easily from casual days to evening events, making it a versatile fall favorite.
19) Olive Green Matte Finish
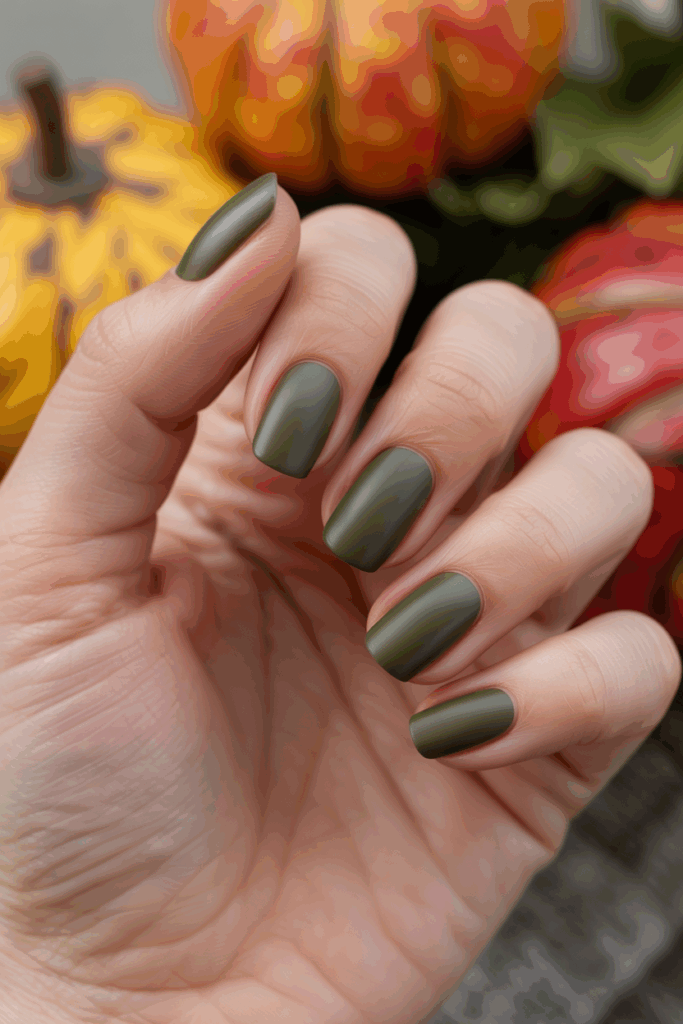
Olive green strikes a balance between earthy and trendy, making it a perfect fall color choice. In a matte finish, the shade becomes even more sophisticated, giving nails a velvety, muted appearance. It works equally well on short nails or longer almond shapes.
This design pairs beautifully with gold jewelry and warm autumn clothing like camel coats and chunky knit scarves. The muted tone keeps it versatile while still feeling fashion-forward.
Olive is also a great alternative to more traditional fall colors like burgundy or orange, offering something unique but still seasonal. Whether styled alone or with small metallic accents, it feels chic and effortless.
20) Cinnamon Spice Glitter
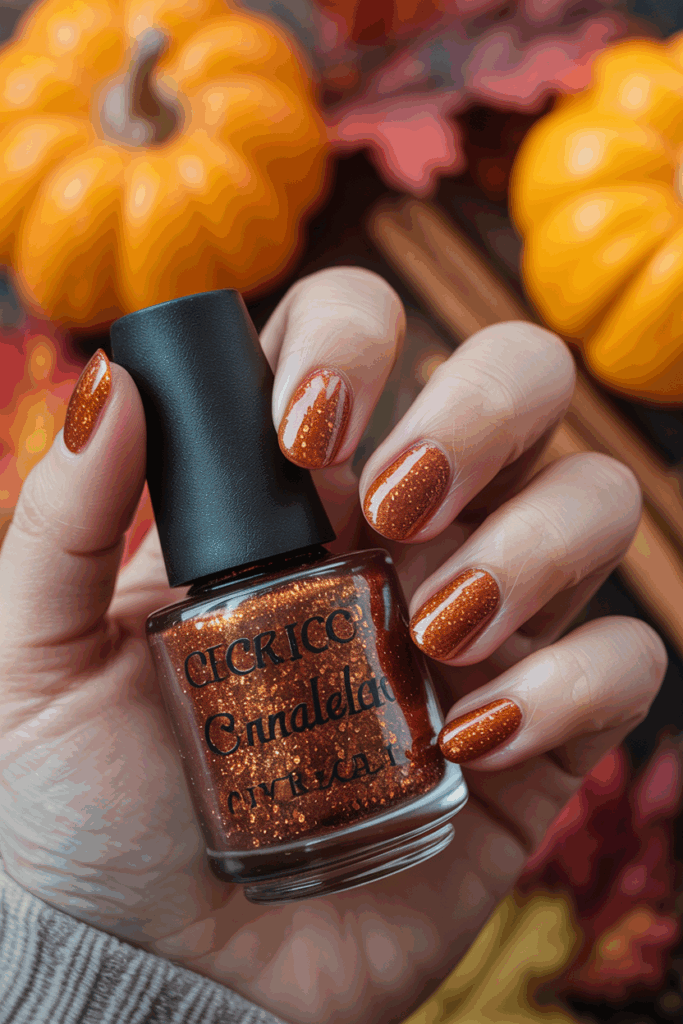
Cinnamon brown is cozy on its own, but when infused with glitter, it turns into a festive, sparkling design that’s perfect for fall evenings. The warm, spiced shade captures the comfort of autumn drinks and baked goods.
Glitter gives the manicure movement and light, catching attention without being overpowering. You can keep the glitter concentrated on the tips for a subtle touch or apply it across the whole nail for extra glam.
This look pairs especially well with fall parties and holiday gatherings, but it can be toned down for everyday wear. It’s a sweet nod to seasonal treats while still feeling chic.


